
Setting up Grafana and Prometheus for Effective SQL Server Monitoring and Metrics
Are you tired of constantly monitoring your Microsoft SQL Server instance manually? Do you want to streamline the process and receive real-time alerts and notifications for any issues? Look no further! In this blog post, we will guide you through the steps of setting up Grafana and Prometheus for efficient monitoring, notification, and metrics collection of your SQL Server.
By leveraging the power of Grafana and Prometheus, you can gain valuable insights into the performance and health of your SQL Server, all in one centralized location. Say goodbye to tedious manual monitoring and hello to a seamless, automated system that keeps you informed and in control.
In the following sections, we will walk you through the installation and configuration of Grafana and Prometheus, show you how to connect them and demonstrate how to set up alerts and notifications for your SQL Server. We will also delve into the world of SQL Server metrics with Prometheus, allowing you to analyze and visualize performance data like never before.
Whether you’re a database administrator or a SQL Server enthusiast, this blog post is for you. So, let’s dive in and unlock the full potential of monitoring your SQL Server with Grafana and Prometheus. Get ready to revolutionize your monitoring experience and take control of your SQL Server like never before!

Setting up Grafana and Prometheus for SQL Server monitoring
Installing and configuring Prometheus
To start monitoring your Microsoft SQL Server instance, the first step is to install and configure Prometheus. Prometheus is a monitoring system that collects and stores metrics from various sources. Download Prometheus from the official website and install it on your server. Once installed, configure Prometheus by editing the configuration file. Specify the targets from which Prometheus should scrape metrics, including your SQL Server instance. This will enable Prometheus to collect the necessary data for monitoring.
Installing and configuring Grafana
After setting up Prometheus, the next step is to install and configure Grafana. Grafana is an open-source platform that allows you to create and visualize custom dashboards. Begin by downloading Grafana from the official website and installing it on your server. Once installed, configure Grafana by accessing the web interface and setting up a data source for SQL Server. This will allow Grafana to connect to your SQL Server instance and retrieve the necessary data for monitoring.
Connecting Grafana to Prometheus
With both Grafana and Prometheus installed and configured, it’s time to connect them. In Grafana’s web interface, navigate to the data source configuration and select Prometheus as the data source type. Enter the URL of the Prometheus server and save the configuration. This will establish the connection between Grafana and Prometheus, allowing Grafana to retrieve metrics data from Prometheus.
Configuring SQL Server for monitoring
Before you can start monitoring your SQL Server instance with Grafana and Prometheus, you need to configure SQL Server to expose the necessary metrics. Enable the SQL Server extended events and configure the necessary event sessions and targets. This will allow SQL Server to capture and publish performance metrics to Prometheus. Once the configuration is complete, Grafana will be able to retrieve these metrics and display them on your custom dashboards.
By following these steps, you can easily set up Grafana and Prometheus for monitoring your Microsoft SQL Server instance. With Grafana’s powerful visualization capabilities and Prometheus’ comprehensive metric collection, you’ll be able to gain valuable insights into your SQL Server’s performance. Stay tuned for the next section on creating SQL Server dashboards in Grafana, where we will explore how to visualize and analyze your SQL Server metrics in a meaningful way.
Installing and configuring Prometheus
First step is to install and configure Prometheus to collect and store metrics from your Microsoft SQL Server instance. Prometheus is an open-source monitoring solution that offers powerful features for gathering and analyzing metrics data.
To install Prometheus, you can follow these steps:
- Download the Prometheus binary package from the official Prometheus website.
- Extract the downloaded package to a directory on your server.
- Open the Prometheus configuration file (prometheus.yml) and make any necessary changes according to your setup. For example, you may need to specify the SQL Server instance you want to monitor and the credentials to connect to it.
- Save the configuration file and start Prometheus by running the executable.
Once Prometheus is up and running, you need to configure it to scrape metrics from your SQL Server instance. This involves specifying the SQL Server endpoint, the metrics you want to collect, and any custom queries you want to run. Prometheus uses a query language called PromQL to perform these tasks.
To configure Prometheus for SQL Server monitoring, you can:
- Open the Prometheus web interface by accessing http://localhost:9090 (or the appropriate IP address and port) in your browser.
- Navigate to the “Targets” page and click on “Add target” to specify the SQL Server endpoint.
- Enter the details of your SQL Server instance, such as the hostname, port, and any authentication credentials required.
- Save the configuration and Prometheus will start scraping metrics from your SQL Server instance at regular intervals.
By installing and configuring Prometheus, you can now collect and store valuable metrics from your Microsoft SQL Server instance. This will allow you to monitor the performance and health of your SQL Server database, identify any potential issues, and make informed decisions to optimize its performance. In the next section, we will explore how to connect Grafana to Prometheus and create SQL Server dashboards for visualization and analysis. Stay tuned!
Installing and configuring Grafana
Once you have set up Prometheus, the next in setting up a robust monitoring system for your Microsoft SQL Server. Here’s how you can get started:
- Start by downloading the latest version of Grafana from the official website. Choose the appropriate package for your operating system and architecture.
- Once the download is complete, follow the installation instructions specific to your operating system. Typically, this involves running the installer and accepting the license agreement.
- After the installation is complete, open your web browser and navigate to the Grafana web interface. By default, it runs on port 3000. You may need to configure your firewall to allow incoming connections to this port.
- On the login page, enter the default username and password, which are usually “admin” for both. It is highly recommended to change the password after the initial login.
- Once logged in, you will be prompted to configure a data source. Select “Prometheus” from the list of available options. Enter the necessary details, such as the address and port of your Prometheus server.
- After configuring the data source, you can start creating dashboards and visualizations to monitor your SQL Server. Grafana provides a wide range of graphing and charting options, allowing you to customize the monitoring experience according to your specific needs.
Installing and configuring Grafana may seem like a daunting task, but with these steps, you’ll be up and running in no time. By setting up Grafana, you’re taking the first step towards gaining valuable insights into your SQL Server’s performance and ensuring its smooth operation. So le
Connecting Grafana to Prometheus
Now that we have successfully installed and configured Grafana and Prometheus, the next step is to connect Grafana to Prometheus. This connection will allow Grafana to retrieve the metrics and data collected by Prometheus and use them to create visually appealing and informative dashboards.
To connect Grafana to Prometheus, we need to add Prometheus as a data source in Grafana. Start by opening the Grafana web interface and navigating to the “Configuration” section. From there, select “Data Sources” and click on the “Add data source” button.
In the “Add data source” page, choose “Prometheus” as the type of data source. Enter a name for the data source, such as “Prometheus”, and specify the URL where Prometheus is running. Make sure to provide the correct URL and port number for the Prometheus server. Click on the “Save & Test” button to check if the connection to Prometheus is successful. If everything is configured correctly, you should see a success message.
Once the connection between Grafana and Prometheus is established, we can start using the data collected by Prometheus to create dashboards in Grafana. By selecting the “Create” option in Grafana and choosing “Dashboard”, we can begin designing our custom dashboards. This allows us to visualize the metrics and data from our SQL Server instance in a way that is easy to understand and analyze. We can add various panels to our dashboards, such as graphs, tables, and single stat panels, to display the desired information.
Connecting Grafana to Prometheus is a crucial step in setting up a comprehensive monitoring system for your SQL Server instance. This integration enables you to leverage the power of Grafana’s visualization capabilities and Prometheus’ data collection and storage capabilities. By connecting these two tools, you can gain valuable insights into the performance and health of your SQL Server and make informed decisions based on the data provided. Whether it’s monitoring query performance, tracking resource utilization, or identifying bottlenecks, Grafana and Prometheus together offer a robust solution for SQL Server monitoring.
Configuring SQL Server for monitoring
Enabling SQL Server Extended Events
To monitor the SQL Server using Grafana and Prometheus, we need to enable Extended Events in the SQL Server. Extended Events provide a powerful framework for collecting and analyzing data about SQL Server events.
To enable Extended Events, open SQL Server Management Studio and connect to your SQL Server instance. Then, navigate to the “Management” folder, right-click on “Extended Events,” and select “New Session.” In the session properties, specify the events you want to capture and configure any additional settings, such as the target file location. Once you’ve set up the session, enable it by right-clicking on it and selecting “Start Session.”
Creating a SQL Server User for Monitoring
To ensure secure access to your SQL Server instance, it’s recommended to create a dedicated user account for monitoring purposes. This user account will be used by Grafana and Prometheus to connect to SQL Server and gather monitoring data.
To create a new user account, open SQL Server Management Studio and connect to your SQL Server instance. Navigate to the “Security” folder, right-click on “Logins,” and select “New Login.” In the login properties, specify a login name and password for the monitoring user. Make sure to grant the necessary permissions to the user, such as the VIEW SERVER STATE permission, which allows the user to access monitoring data.
Configuring SQL Server Firewall Rules
By default, SQL Server has a firewall that restricts incoming connections. To allow Grafana and Prometheus to connect to SQL Server, we need to configure the SQL Server firewall to allow incoming connections from their respective IP addresses.
To configure the SQL Server firewall, open SQL Server Configuration Manager and navigate to the “SQL Server Network Configuration” section. Select the “Protocols for [your SQL Server instance]” option, and then enable the TCP/IP protocol. In the TCP/IP properties, navigate to the “IP Addresses” tab and specify the IP addresses of Grafana and Prometheus in the “IPAll” section. Finally, restart the SQL Server service to apply the changes.
Enabling SQL Server Agent for Alerts
To receive alerts from SQL Server, we need to enable the SQL Server Agent service. The SQL Server Agent is responsible for scheduling jobs and sending alerts based on predefined conditions.
To enable the SQL Server Agent, open SQL Server Management Studio and connect to your SQL Server instance. Right-click on the “SQL Server Agent” folder and select “Properties.” In the properties window, navigate to the “General” tab and set the “Start Mode” to “Automatic.” Click “OK” to save the changes, and then right-click on the “SQL Server Agent” folder again and select “Start” to start the service.
Testing the SQL Server Monitoring Configuration
After configuring SQL Server for monitoring, it’s important to test the configuration to ensure everything is working correctly. You can use the Grafana and Prometheus dashboards to visualize the monitoring data and verify that the metrics are being collected properly.
Open Grafana in your web browser and navigate to the SQL Server dashboard. You should see real-time metrics and performance data for your SQL Server instance. Additionally, you can set up test alerts in Grafana to ensure that notifications are being sent when specific conditions are met.
By following these steps, you can effectively configure SQL Server for monitoring using Grafana and Prometheus. Monitoring your SQL Server instance provides valuable insights into its performance and helps you identify and address any potential issues proactively.
Creating SQL Server dashboards in Grafana
Now that we have successfully installed and configured Grafana and Prometheus for monitoring our Microsoft SQL Server instance, it’s time to take a closer look at creating SQL Server dashboards in Grafana. By creating customized dashboards, we can visualize and analyze the performance metrics of our SQL Server in a more intuitive and meaningful way. Here’s how you can do it:
- Accessing the Grafana Dashboard: Open your web browser and enter the URL of your Grafana instance. Log in using your credentials to access the Grafana dashboard.
- Adding a new Dashboard: Once you’re in the Grafana dashboard, click on the “+” icon in the left-hand sidebar and select “Dashboard”. This will create a new empty dashboard for you to work on.
- Adding Panels: To display the SQL Server metrics, we need to add panels to our dashboard. Click on the “Add Panel” button and choose the type of panel you want to add, such as a graph or a table.
- Configuring the Panel: After adding the panel, you can configure it to display the desired SQL Server metrics. Specify the data source as Prometheus, and then select the appropriate metric and visualization options. You can add multiple panels to your dashboard to display different metrics side by side.
Once you have added and configured all the necessary panels, you can arrange them on your dashboard to create a comprehensive view of your SQL Server performance. Don’t forget to save your dashboard to ensure that your configuration is preserved. With the flexibility and customization options provided by Grafana, you can create visually appealing and informative SQL Server dashboards that provide valuable insights into your database’s performance.
Creating SQL Server dashboards in Grafana is just one aspect of effectively monitoring and managing your SQL Server instance. In the next section, we will explore how to set up alerts and notifications in Grafana to ensure that you’re promptly notified of any critical issues or anomalies in your SQL Server’s performance. Stay tuned!
Stay tuned for the next blog post section where we will discuss setting up alerts and notifications in Grafana for your SQL Server.
Setting up alerts and notifications in Grafana
Setting up alerts and notifications in Grafana is an essential step in ensuring the timely detection and resolution of any issues with your Microsoft SQL Server instance. By configuring alerts, you can proactively monitor critical metrics and receive notifications when certain conditions are met. Let’s dive into how you can set up alerts and notifications in Grafana.
To begin, navigate to the “Alerting” section in Grafana. Here, you can create new alert rules by specifying the conditions that trigger an alert. You have the flexibility to choose from various options such as thresholds, time intervals, and aggregations to define when an alert should be triggered.
Once you have defined the alert conditions, you can configure the notification channels in Grafana. These channels determine how and where you receive the alert notifications. Grafana offers a wide range of options for notifications, including email, Slack, Microsoft Teams, PagerDuty, and more. You can choose the most suitable channel for your team’s needs.
After setting up the notification channels, you can assign them to specific alerts. This allows you to customize the recipients for each alert based on their relevance and importance. For example, you might want to notify your database administrators for critical alerts, while sending less severe alerts to the development team.
Grafana also provides the ability to set up alert notifications based on different severity levels. You can configure different notification rules for critical, warning, or informational alerts. This helps to ensure that the right people are notified promptly, allowing for faster response and issue resolution.
By setting up alerts and notifications in Grafana, you gain the advantage of proactive monitoring and timely response to any issues with your SQL Server instance. This proactive approach can help minimize downtime, optimize performance, and improve the overall reliability of your system. So, take the time to configure alerts and notifications in Grafana and stay ahead of any potential problems with your SQL Server.
Monitoring SQL Server metrics with Prometheus
Monitoring the metrics of your SQL Server instance is crucial for maintaining its performance and identifying any potential issues. With Prometheus, you can efficiently collect and store these metrics, providing you with valuable insights into your database’s health and performance.
To start monitoring SQL Server metrics with Prometheus, you need to configure the SQL Server Exporter. This exporter is responsible for collecting the necessary metrics and exposing them to Prometheus. You can easily install and configure the SQL Server Exporter using the official documentation, which provides step-by-step instructions.
Once the SQL Server Exporter is set up, it will scrape the metrics from your SQL Server instance and expose them as Prometheus metrics. These metrics include valuable information such as CPU usage, memory consumption, disk I/O, and query performance. You can then use these metrics to create custom dashboards in Grafana, allowing you to visualize and analyze the performance of your SQL Server.
By monitoring SQL Server metrics with Prometheus, you gain a deep understanding of your database’s behavior and performance trends. You can easily detect patterns and anomalies, enabling you to take proactive measures to optimize your SQL Server instance. Additionally, having access to historical metrics allows you to perform trend analysis and capacity planning, ensuring that your SQL Server environment remains efficient and scalable.
In conclusion, monitoring SQL Server metrics with Prometheus is a powerful way to gain insights into your database’s performance. By leveraging the SQL Server Exporter and Grafana, you can create custom dashboards and set up alerts to promptly respond to any issues. With this monitoring setup in place, you can ensure the optimal performance and availability of your SQL Server instance.
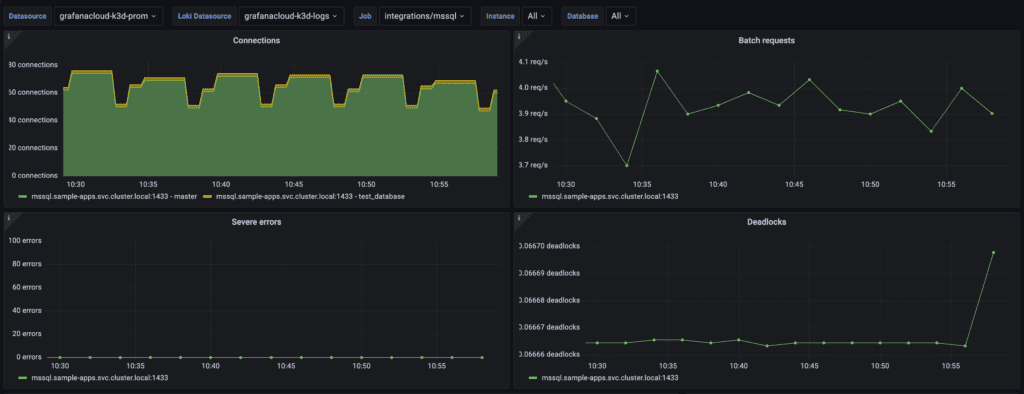
Analyzing and visualizing SQL Server performance data
Once you have successfully set up Grafana and Prometheus for monitoring your Microsoft SQL Server instance, it’s time to dive into analyzing and visualizing the performance data. This step is crucial in understanding the health and efficiency of your SQL Server and making informed decisions for optimization.
Analyzing SQL Server performance data involves examining various metrics such as CPU usage, memory consumption, disk I/O, and query execution time. With Grafana’s intuitive interface, you can easily create custom dashboards tailored to your specific monitoring needs. By selecting the appropriate metrics and visualizations, you can gain insights into the overall performance trends and identify any potential bottlenecks or areas of improvement.
Visualizing the performance data not only makes it easier to interpret and analyze but also helps in presenting the information effectively to stakeholders or team members. Grafana offers a wide range of visualization options, including line graphs, bar charts, gauges, and heatmaps, to represent the SQL Server metrics in a visually appealing and comprehensible manner. This visual representation allows you to quickly identify patterns, anomalies, or correlations that may impact the performance of your SQL Server.
To further enhance your analysis, Grafana also supports the use of SQL Server-specific plugins and integrations. These plugins can provide additional insights and visualizations for SQL Server-specific metrics and performance indicators, such as database growth, transaction throughput, or query execution plans. By leveraging these integrations, you can get a more comprehensive view of your SQL Server’s performance and make informed decisions to optimize its efficiency.
In conclusion, analyzing and visualizing SQL Server performance data using Grafana and Prometheus enables you to gain valuable insights into the health and efficiency of your SQL Server instance. With the ability to create custom dashboards and choose from a variety of visualization options, you can easily interpret and present the performance metrics. By leveraging SQL Server-specific plugins and integrations, you can further enhance your analysis and make data-driven decisions to optimize your SQL Server’s performance.
Troubleshooting common issues
When it comes to monitoring your SQL Server with Grafana and Prometheus, it’s essential to be prepared for any potential issues that may arise. In this section, we will explore some common troubleshooting scenarios and provide solutions to help you overcome them.
One common issue that users may encounter is a failure to connect Grafana to Prometheus. This can happen due to misconfiguration or network-related problems. To troubleshoot this, first, ensure that both Grafana and Prometheus are running and accessible. Check that the Prometheus data source is properly configured in Grafana, including the correct URL and authentication details if necessary. Additionally, verify that any firewalls or security groups are not blocking the communication between Grafana and Prometheus.
Another issue you may encounter is the absence of SQL Server metrics in Grafana. This could be due to the incorrect setup of Prometheus scraping SQL Server metrics or a problem with the SQL Server configuration itself. To address this, double-check that you have correctly configured the SQL Server endpoint in Prometheus and that the necessary metrics are being scraped. Make sure that the SQL Server instance has the necessary permissions to allow access to the metrics. If the issue persists, try restarting both Prometheus and the SQL Server instance.
Sometimes, alerts and notifications in Grafana may not be functioning as expected. This could be due to misconfiguration or problems with the underlying alerting system. To troubleshoot this, review the alerting rules and ensure that they are correctly defined in Grafana. Verify that the necessary conditions for triggering alerts are being met. Additionally, check the alert notification channels in Grafana and ensure they are properly set up, including any required authentication details or connection settings. If alerts are still not working, consider testing the underlying alerting system, such as email or Slack, to ensure it is functioning correctly.
Lastly, if you are experiencing performance issues with Grafana or Prometheus, there are a few steps you can take to troubleshoot. First, check the resource utilization of both Grafana and Prometheus servers. Ensure they have enough CPU, memory, and disk space to handle the monitoring workload. Additionally, review the query performance in Grafana and optimize any slow or inefficient queries. If the issue persists, consider scaling up the hardware or optimizing the server infrastructure to improve performance.
By being aware of these common troubleshooting scenarios and following the provided solutions, you can minimize downtime and ensure that your SQL Server monitoring with Grafana and Prometheus runs smoothly. Remember to document any issues and their resolutions for future reference, allowing you to quickly address similar problems in the future.
Conclusion
In conclusion, setting up Grafana and Prometheus for monitoring, notification, and metrics for SQL Server can greatly enhance your ability to monitor and analyze the performance of your database. It allows you to create visually appealing dashboards that provide real-time insights into the health of your SQL Server environment. By configuring alerts and notifications, you can stay informed about any potential issues or anomalies that may arise.
With Grafana and Prometheus, you can easily connect and integrate these powerful tools to create a seamless monitoring and analytics platform for your SQL Server. From installation and configuration to creating dashboards and setting up alerts, we have covered all the necessary steps to get you started.
By monitoring SQL Server metrics and analyzing the performance data, you can identify bottlenecks, optimize queries, and improve the overall efficiency of your database. Troubleshooting common issues becomes easier with the wealth of data and visualizations provided by Grafana and Prometheus.
In today’s fast-paced world, it is crucial to have a reliable and efficient monitoring system for your SQL Server. With Grafana and Prometheus, you can have full visibility into the performance of your database and take proactive measures to ensure its smooth operation.
So, don’t wait any longer. Start setting up Grafana and Prometheus for monitoring, notification, and metrics for your SQL Server today and unlock the full potential of your database. Your SQL Server’s performance and stability will thank you. Happy monitoring!